Looking for a great project for students to demonstrate their thinking? Want a better way for students to present their learning? Interested in getting some listening and speaking skills into your students’ repertoire?
Educreations might be the answer for you.
Educreations is a free web and iPad based platform designed for teachers to record audio-visual lessons for their students to view (primarily at home). Here’s how it works: Imagine you are giving a lecture while using your document reader or overhead projector. Imagine a microphone is recording everything you are saying, and a camera is recording everything you are writing. But, you are not in the “movie” at all – just the “canvas” you are writing on is visible to viewers.
That’s how most teachers are using Educreations. But not me. I am hacking it: Instead of the teachers making recordings for students, I have students make recordings for their teachers and peers.
The app’s design is simple, clean and intuitive. Here are a few examples made my eighth-graders.
An Easy First Project
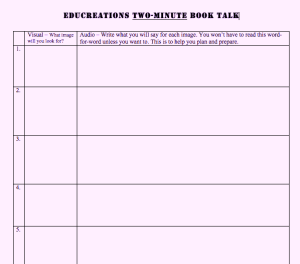
As you probably surmised from the student projects above, the assignment was to make a digital book talk. Students got to pick any book they read and enjoyed recently, and they had to limit their project under two minutes and use a planning sheet (below) to prepare.
 Once students finished their planning sheets, they began setting up their slides and gathering images. They took pictures with the iPad’s built in camera. They also gathered internet images through Educreations’ handy ability to tap an icon to search for web images. They also pulled images from Creative Commons on Flickr online and saved them to their camera roll. (This provides a valuable opportunity to talk about plagiarism- it’s not just about text anymore now that images are so easily available.)
Once all slides were ready, it was time to narrate their presentations. This is where students stalled. I had to really push them to record – they were suddenly very self-conscious. The audio for this project was not ideal. It’s easy to hear all the classroom noise in the background of student presentations. I let a few of the most reluctant students step into the hallway to record, but most became more comfortable once they began working and were aware of their peers also struggling to get through their scripts without flubbing their lines.
Keeping Things Interesting
 To create visual interest and keep their audience engaged, I wanted students to use 5-7 slides with different images on each to accompany their spoken narratives. I also encouraged students to plan to annotate their slides as they recorded them by writing on the iPad screen with their fingers.
Another way the students can create visual interest is to animate the slides. To do this, students create a slide with an image. Then copy the slide and add a second image (it’s a bit like in PowerPoint). When the project is finished, the visual affect is that the images seem to pop into the slides.
How I Set Up Educreations Accounts
Rather than explain all the nuances of setting up an account, I recommend reading this quick-start guide to using Educreations. That said, here are some tips I learned along the way.
Option One (The Intended Way)
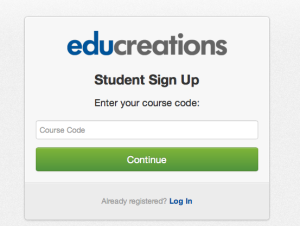
Once you create your own Educreations account, you can create a “course” within your account and give students a  code to access the course.
Typically, this is so students can watch a teacher-made presentation. But it can also be used to house presentations made by students.
I like the way you can give your students your “course code” when they set up their account, so they don’t have to waste time searching Educreations for your class. Even better, they don’t have to enroll with an email address – they can just type in a username and password (which you can manage later, in case they forget either one).
Once they have logged in, they can begin making their own presentations.
Tip #1: Educreations will ask them for their email address anyway. Make sure your kids know this isn’t mandatory.
Tip #2: The course code is hard to find. Locate it by clicking on the “Students” tab of your course.
Option Two – The Hack (Non-Intended) Way
 The super easy and super fast way to get your kids using Educreations is to make a single student account and give everyone in your class (or class period) access to that account. This is how I began using Educreations very quickly. But it’s risky. It requires that you trust your students to not monkey with each other’s presentations.
For me, the advantages were clear:
- Checking For Completion- Every presentation loads into one student account so you can see everything from one class all at once. In other words, I could see at a glance which of my students had uploaded their work. I didn’t have to click around in their individual accounts to find out. The other advantage is that I didn’t have to manage multiple usernames and passwords (since we were all on the same account).
- Getting To Work Quickly – Eliminating the time-suck of creating usernames and passwords meant that students began work immediately.
- Easy Sharing – My students were excited about their products and eager to see each other’s. As soon as they finished, many started watching others that had been uploaded. They didn’t have to wait for me to be at the front of the room to show the whole class the finished work.
This is definitely not a “best practice” since a student could purposely delete another student’s project (it’s pretty hard to do it accidentally, given the warnings that pop up). But, given the trust we’ve built in my class, I decided to risk it. As a precaution, I did change the password as soon as I dismissed the class, and gave them the new password the next day of work. Next time I might do it differently, but I was eager to just jump in, for better or worse. And, now that they know how to use the app, there will be less ramp-up time before they begin working. Next time I would probably give them individual accounts without worrying about losing classroom work-time.
How about you? What has been your experience using apps like Educreations? Join the conversation.


Leave A Response